Okay, real talk – I got obsessed with diy tool storage organizing ideas after one too many evenings hunting for a single screwdriver in a messy garage. I used to lose screws in socks and call it modern art, but now I get weirdly excited about labeled bins and pegboard layouts. This whole post is basically the brain-dump of what actually worked for me.
I made this because I know how paralyzing a cluttered workspace can be – you avoid projects because finding a wrench feels like a treasure hunt. Over the last two years I tried a bunch of systems, failed gloriously a few times, and slowly built setups that actually save time and patience. I’m keeping it real – some ideas are cheap, some take a weekend, and some are glorified IKEA hacks that I low-key love.
Below you’ll find 25 practical, pretty, and totally do-able diy tool storage organizing ideas you can copy this weekend, plus tips so it sticks. You’ll get inspiration, quick how-tos, and the tiny hacks I wish I’d known sooner.
These 25 DIY Tool Storage Organizing Ideas You’ll Actually Use
Bin Wall Storage
This rack-and-bin combo is my go-to image when I tell friends that “bins are life.” I love the way everything has its own home – no more empty-handed searches. One weekend I bought a dozen clear bins and labeled them by project and it changed my Saturday afternoons; true story. If you have a spare wall, this is the simplest first step.
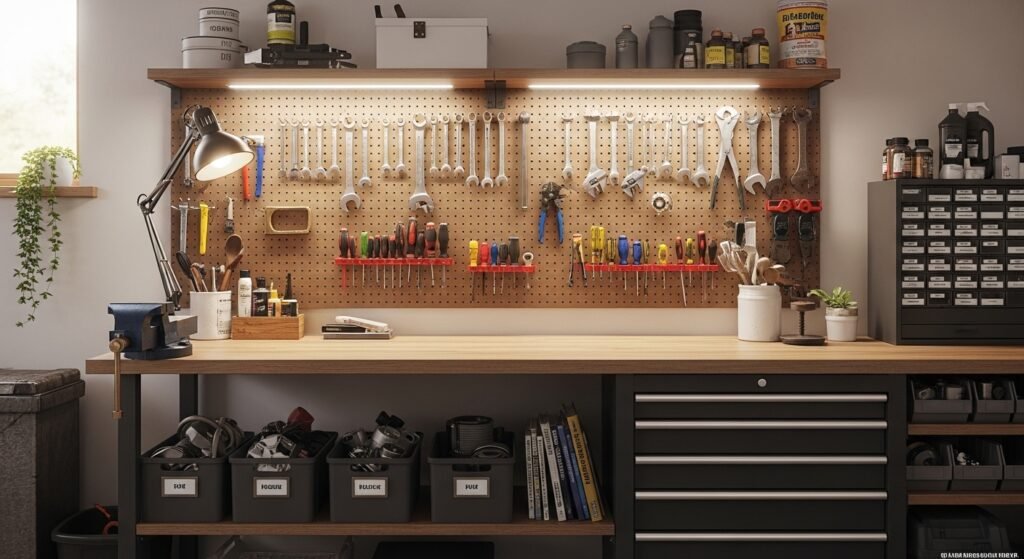
Pegboard Workbench Wall
Pegboard is like the blank canvas of garages – you can move hooks, store rollers, and reorganize forever. I started with just a small pegboard and kept adding hooks for things I actually used, not everything I owned. Sometimes I rearrange it at 10pm and regret nothing – it’s addictive.
Foldable Mobile Bench
Wheels + folding table = instant freedom, especially if your workspace doubles as a laundry room or craft area. I built one of these on a rainy Sunday and it saved my back so many times during long projects. When guests come over, I fold it away and pretend I’m an adult with tidy priorities.
Under-Sink Drawer Fix
This screenshot feels homey – using drawer systems for tools is underrated, especially in the kitchen or workshop. My partner used to hide screws in the junk drawer (why?) so making a dedicated drawer for hand tools was a relationship win. Try shallow trays for small parts so nothing rolls into the doom zone beneath the pipes.
Rolling Drawer Cart
Drawer boxes on casters are the cheat code for mobile storage – slide it to the car or into the corner. I built a small one for sanding supplies and it now follows me like a loyal little cart. The bottom drawer can be for heavy items I don’t want to lug around, which is honestly a smart move.
Workbench Plans Shown
I’m a sucker for good plans – they make building feel possible, not intimidating. When I used a simple plan, the bench was up in a day, and I felt like a pro. Pro tip: measure twice and laugh at your past self if you didn’t.
Simple Tool-Topped Bench
There’s something comforting about a bench with tools casually placed on top – it says “projects in progress.” I leave a small tray for my current project – screws, pencil, tape measure – it keeps momentum. Also, paint a small corner with chalkboard paint for quick notes.
Open Cabinet Storage
Open cabinets like these make tools visible and accessible without the cluttered feel. I used a similar setup for my gardening tools – less chaos, more joy. Sometimes I will stand and admire the neatness for 30 seconds before I start a project; I’m not proud but it’s true.
Tool-Filled Workbench
This image screams utility – lots of tools, built-in storage, and purpose. I once created a “daily use” zone on my bench so things I grab often are front-and-center. Not glamorous, but so practical when you’re mid-project and panicking slightly about missing pliers.
Garage Workbench Vibes
A dedicated garage bench like this is perfect if you have the space and the patience to commit. My dad helped me build mine and we blasted 90s playlists while attaching the top – sweet memories. If you only tackle one project, build a solid bench that won’t wobble forever.
Organized Desk Compartments
Smaller desks with cubbies are perfect for hand tools, not just paper. I turned an old desk into a tiny parts hub and it holds my ever-growing stash of sandpaper, glue, and curios. It’s cute and useful – two things I chase constantly.
Tool-Heavy Bench Setup
A bench loaded but organized is inspiring – like a chef with their knives displayed. I try to keep frequently used items within arm’s reach and store the rest away. Oh, and coffee nearby is non-negotiable during long project days.
Box Interior Organization
Compartmentalized boxes make small parts less terrifying – a tiny victory every time you open the lid. I labeled each compartment with a tiny sticky note while drinking tea; yes, organizational bliss and tea go together. Keep one of these by the bench for random bits that always seem to appear.
Empty Shelves Ready
Empty shelving is an invitation – fill it with intention, not impulse buys. When I first moved into my space, I painted the shelves white to make the tools pop and to make everything feel cleaner. Pro tip: leave a little breathing room so it doesn’t look like a store’s backroom.
Garage Shelving Unit
Heavy-duty shelving units are the backbone for big tool collections and paint cans – sturdy and straightforward. I once stacked everything vertically and then realized I couldn’t reach the top shelf without a stool – so plan height carefully. Label shelf edges – your future self will thank you.
Side Drawer Access
Side drawers in workbenches are underrated – perfect for chisels, blades, and small hand tools. I use soft liners inside so tools don’t clatter when I open things quickly and spill my coffee – true story, lol. It makes the whole space feel custom and tidy.
Kitchen Cabinet Inspiration
Yes, kitchen cabinetry ideas can translate to tool storage – deep drawers, slots, and dividers are great. I converted an old kitchen cabinet into a parts station and the pull-out drawers are dreamlike. Don’t be afraid to repurpose furniture for your workshop.
Mobile Workbench Build
Mobile benches are perfect when you improvise projects in different rooms – paint and tools in the same rolling cart? Yes. I wheeled mine into the driveway to stain a tabletop once and it felt like a tiny victory parade. Wheels are cheap joy.
Simple Human-Scale Bench
Having a bench at the right height matters so much I could cry – your back will thank you. My bench height experiment took a few tries, and yes I built two tops before settling on the right one. When in doubt, test with the tools you use most.
Garage Bench Build-in-Progress
Watching a bench come together is oddly soothing – it’s the promise of order. I documented one build and now it’s my favorite photo to show friends like “look at what I made.” If you can, recruit a friend for a weekend – tasks go faster and you get jokes.
Tote Organizer Tote
Portable totes are lifesavers for small quick jobs around the house – scissors, tape, a handy screwdriver, done. I keep one in the trunk for emergencies and it has saved the day more times than I can count. It’s the “throw-in-and-go” solution I recommend for renters.
Wall + Shelf Combo
Combining wall storage with overhead shelves maximizes vertical space, which is clutch in small garages. I put seasonal items up high and daily tools at eye level – it’s a mental load-saver. Also, a little plant on a top shelf makes the space less cave-like.
Garage Interior Flow
A clean garage interior with clear zones makes work feel faster and less chaotic. I mapped my zones: repair, paint, small parts, and recycling – it’s nerdy but effective. Try sketching your ideal layout on paper before moving heavy stuff around.
Two-Bench Setup
Having two benches lets you keep one for messy work and one for delicate assembly – game changer. My two-bench approach saved me from sanding dust on a freshly glued piece one time – learn from my mistakes here. If you can, split the tasks spatially and your projects will breathe easier.
Wall of Hanging Tools
Hanging tools on the wall makes everything visible and decorative in a utilitarian way. I traced outlines on a pegboard once to teach flatmates where things go – weirdly satisfying for everyone. It’s low-cost and immediately impactful for any space.
How to Actually Make This Work For You
Start small and make one corner of your workspace the “pilot” zone – pick the bench or wall you’ll use daily and organize that first so you see quick wins and stop making excuses. Invest in clear containers and labels for the things you reach for most, and don’t try to mimic a perfect Pinterest room; make it practical for your habits, not someone else’s aesthetic. Finally, set a 20-minute weekly tidy session so the system becomes a habit instead of a weekend project you never finish.
How do I choose between pegboard and shelving?
Think about visibility versus storage – pegboard is great for items you use often because everything is visible and easy to grab, while shelving is better for bulkier items and boxes. I usually pair them: pegboard at arm height, shelving above or beside it.
What’s the best way to organize small parts?
Use compartment boxes or drawer organizers and label each compartment – clear lids help you find things fast. I keep a few “emergency” boxes for odd screws and new project bits so they don’t wander forever.
Can I make a mobile setup on a budget?
Absolutely – repurpose an old dresser or buy a basic rolling utility cart and add foam liners or small bins. I made a mobile kit from a thrifted cart and it cost less than one nice screwdriver set, so yes, it’s doable.
How do I keep the system from getting messy again?
Make returning things to their home part of the project workflow – treat the last five minutes of any session as cleanup time. I set a small timer for tidy-up and it helps prevent the slow creep back to chaos.